It is important that teachers utilize the use of various helpful resources that are available to them. Examples would be research journals, publications, and professional organizations. I recently joined a professional organization called the Association for Childhood Education International, or ACEI. This organization prints a journal called Childhood Education. The mission statement of this organization is “to promote and support the optimal education and development of children worldwide, and to influence the professional growth of educators and the efforts of others who are committed to the needs of children in a changing society.” This organization focuses mainly on primary age children. They have a very international focus with many international conferences during the year. I think that it will be helpful to have access to the various journals that are available to members of ACEI.
Although I decided to join ACEI, I also did a little bit of research on the organization National Association for the Education of Young Children, or NAEYC. I also researched the organization American Montessori Society. For my class presentation on guiding behavior and appropriate punishment, I found articles from each of the professional organization journals. I also used other resources that I found helpful. I learned much about punishment and how ineffective it can be in the classroom. I also learned a lot about guidance and what that looks like in the classroom. It is so important that teachers disciple their students in appropriate ways.
Once I had my information gathered, it was time to figure out the best way to organize the information to present it to the class. When it comes to presenting information to a group, I have always used the tool Power Point. I find Power Point to be very user-friendly and an effective way to present information to others. However, I understand that Power Point should be used to guide a conversation. It is highly ineffective when someone gets up and simply reads large amounts of text from a Power Point. I recently had the opportunity to learn about another way to present information to a group, and that is the Web2.0 tool Prezi. Prezi is a website that is free to join. I will say that I did not find it very user-friendly. It was hard for me to navigate what I was to do with my information to put it into Prezi. Prezi is different in the sense that it does not have slides like Power Point. Instead, it is a moving presentation that moves in the way that it is guided to move by the user. Once I started getting the hang of Prezi, it was a little user-friendlier. However, I still find Power Point easier to use. This could be partly because I am used to making Power Points, and this was my first experience with Prezi.
I am glad that I learned about Prezi and the most effective ways to use the tool. This could be very helpful for the future. What about you? Have you ever used Prezi in your classroom? Feel free to leave comments below. I’d love to hear your ideas!
The finished product of my first Prezi can be viewed below!
When I think of my favorite toy from my childhood, one name comes to mind: Katie. Katie was my baby doll, and she was named Katie because I named all of my dolls with names beginning with the letter “K”, just like my own. I treated Katie like she was one of the family. She sat in her high chair with us at the dinner table, and I loved changing her outfit multiple times a day. When I went to the mall with my mom, Katie always came along and I loved pushing her in her stroller as we walked around. Because of my love for my friend Katie for many years, I decided to use her for my "toy book" assignment. I was asked to think of my favorite childhood toy and bring it to class. I immediately thought of Katie and thought that she would be perfect for the assignment.
Once I decided on my favorite toy, it was time to assess the toy for an appropriate age. After studying the Child Development Chart, I decided to assess the toy for a five-year-old. This chart contains different areas of development: physical, intellectual, language, emotional, and social. It goes from age 3 months to 5 years. For each age and area of development, there are statements about what a child should be doing at that given stage. This is just a guide, as children develop at different rates.
For the physical component, I chose the statement that says, “has a strong grip with both hands.” I decided that a baby doll is a great way for a five-year-old to develop the ability to grip with both hands. The child would not want to hurt the doll, so he or she would be very careful when holding the doll so that the doll will not drop. This stage of development can be worked on as the child works to have the ability to grip with both hands. For the intellectual component, I chose the statement, “can relate to the time of day corresponding to everyday activities.” For this component, I decided that the child could understand what he or she does at different times of the day, such as naptime, meals, and playtime. This understanding can be shown in the child, as he or she knows when to feed the doll and put her down for her nap. The child can allow the baby doll to follow the same schedule that he or she follows on a day-to-day basis. For the language component, I chose, “still loves to listen to stories, and will use them in play later.” I thought that for this development level, the child could repeat stories that he or she hears to the baby doll. The emotional component was the most obvious, as one of the statements was, “will defend and care for babies and toddlers.” The child will love the baby doll and will care for the baby. He or she will play with and protect the baby. The final component I assessed was the social component. For this one, I thought that the best statement to use would be “can now get dressed undressed by self.” Because the child can now dress and undress his or her self, he or she will enjoy practicing this skill on the baby doll. The baby doll’s outfits can be changed as much as the child desires.
It was interesting for me to study the Child Development Chart. It is neat to see what a child should be doing at a given age. I also enjoyed assessing my favorite childhood toy in terms of these development components. I liked seeing how this toy could be used in activities to help children in terms of their development. Once I had all of this information, I typed it up and made a little book containing all of the information. I also included the past and current price of the toy. I enjoyed this project because it gave me a chance to better understand children’s development levels. It also gave me a chance to reflect about my favorite childhood toy, Katie.
The other thing I have learned about recently is a standardized assessment called Lap-D. This is a scoring booklet that is used to assess children's development. This assessment covers a wide age span: children can be anywhere from one year old to six years old. The first step of this assessment is to determine the child's age, based on months instead of years. There are several subtests in this assessment. The eight subtests allow administrators to really identify where the child is in terms of development. The test can be administered by anyone, but most of the time, it is administered by the classroom teacher. Lap-D is a one-on-one test in which the child performs certain tasks while the teacher observes and takes notes in the booklet. The eight subtests are: fine motor: manipulation, fine motor: writing, cognitive: matching, cognitive: counting, language/cognitive: naming, language/cognitive: comprehension, gross motor: body movement, and gross motor: object movement. There is a book that the administer uses to assess the child. The book tells the teacher what to say and do, depending on the age of the child. There are also various materials that are used to administer the subtests. Because I have not had much experience in this arena, it was interesting for me to learn about this assessment test. I think that it is a good one because it covers a variety of developmental skills. It is also very easy to use.
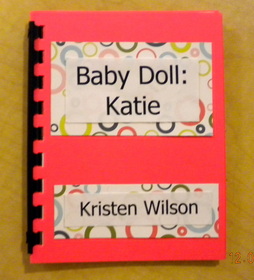
The picture below shows my finished toy booklet!
For as long as I can remember, I have loved pictures. I love looking through photo albums on my computer as well as pulling out old photo albums at my house. I enjoy looking back at pictures and feeling almost as if I am there all over again, experiencing what I was experiencing in the photo. I think that photos can evoke many memories, both positive and negative. To me, photos are important because they are the closest we can get to capturing a moment to remember forever. Because of this, I am always the one saying, “Let’s take a picture!” or “Here, let me take your picture. You’ll want it to look back on one day.” Often, my family members will groan and not find it necessary to take a picture. When this happens, I remind them that one day, they might need the picture to look back on and remember life’s events. Pictures can be a great way to reminisce. Because of my love for pictures, I was excited to have the opportunity to make an iMovie about my life. I was excited to have an excuse to look through old pictures at my house to pick the ones I wanted to use in my iMovie. The pictures had to begin at a very early date and conclude with a recent picture. Besides that, I was free to choose the pictures that I wanted to use in the video. I had to scan many of the pictures I chose to include because we do not have them in digital format. This is because digital cameras were not around when I was growing up. I thoughtfully selected the pictures I would include in my video. I have hundreds of pictures both at my house and in albums on my computer. I chose a picture of me when I was just four days old. After that, I chose pictures that I think describe my life’s events well. For example, I have a picture of my older brother, David, and me when we were very young. The next picture shows my grandmother, David, and myself when we met our brother Corey for the first time. After those three were selected and scanned, I selected various pictures that show my family through the years. I do not have many pictures from middle school because I would consider that to be a very awkward time in which I avoided the camera whenever I could. For the pictures that represent my life in high school, I chose a picture that shows a very hard time in my life, when David was badly injured when a tornado hit Union University. I also chose a picture of me in a play, as well as my high school graduation. Finally, I ended with a current picture of my family. I chose my pictures based on what I thought were important events in my life. I thought that such pictures would be good to include because they show events that made me the person I am today. After my pictures were finally selected, I began making Powerpoint slides that contained my pictures and script. I made a title slide first, and then added a picture and script to each additional slide. When that was finished, I began playing with iMovie. I saved the slides and formatted them to open in iPhoto. Once I opened them in iMovie, it was easy to begin making the movie. I put the slides, which were saved as pictures, into the movie. Then, I began recording my voice for each slide. The last step was adding music to the movie. This was possibly the hardest step for me because I had trouble figuring out how to adjust the volume on the song. It had to be adjusted to the right volume so my voice could still be heard. After watching a couple of very helpful youtube videos, I figured out how to adjust the volume. Overall, iMovie was a fairly user-friendly program. I admit that I had more trouble than I expected to have as I made my video. However, the videos I found online were very helpful. I think that iMovie is user-friendly if you are used to making movies. I think that I had more trouble with it because it was my very first experience making a movie. Because of that, I cannot compare iMovie to other movie programs. However, I am grateful that I had the opportunity to learn about iMovie and more about how to operate the program to make movies. This could be very useful information for my future. I enjoyed making this video about my life. It was neat to have the chance to reflect on my life so far by looking through pictures. I am glad that I have so many pictures and that it was hard for me to choose the pictures I used. Pictures are very valuable to me, and my plethora of pictures came in handy for this project. This is a project that I think would be neat to use in the classroom. I think that students would enjoy the chance to use a program like iMovie or PhotoStory. However, I understand that it depends on the age of the students. A video would also be neat to use to introduce yourself to your students at the beginning of the year. Click here to enjoy my video! Another task I have recently completed was making letter cards. The first step in this process was to cut out black lowercase letters using the die cut machine. I used the Zaner-Bloser style die cuts, which are commonly called block letters. After that, I used a single hole punch to punch holes on the letters. The holes were punched on the spot that one should begin writing that letter. For example, for the letter /t/, the hole went at the very top. It was interesting to see how people often begin their letters in different ways. However, there is a standard way that children should learn how to write their letters. It was neat to see this standard and compare it to the way that I write my letters. Once the holes were punched, the letters were glued to card stock. The paper had faint lines on it to serve as a "writing" grid. I glued all of my vowels on bright yellow paper and the consonants on purple paper. After gluing all of the letters on the paper, I laminated each paper and cut them apart. Finally, I made matching folders for the cards, labeling each one with the correct label. These too were laminated before being stapled together. My letter cards were finally complete! They are very durable, and I'm sure they will come in handy in the future. They are great to use to show young children how to write in the correct way. Children need to know where to begin their letters. What about you? Have you ever made letter cards for your classroom? If so, please feel free to share below! I would love to hear how you used them in the classroom. Below, you can see a picture of my finished letter cards!
|

 RSS Feed